One of the first purchases I made after eliminating processed foods from our home was the Panasonic SD-YD250 Automatic Bread Maker. I was scared to order something so expensive right out of the gate with our new lifestyle.
However, as I started reading the ingredients while grocery shopping, I found it impossible to find a loaf of bread with ONLY real ingredients with which I was familiar. Every loaf contained preservatives so that it could sit on a grocery store shelf for weeks.
I knew if I wanted to do a real foods-only lifestyle “right,” I had to make my own bread. So, I took the plunge and made the purchase! I was nervous I might not use it enough or that I wouldn’t be able to make the sandwich bread we all liked, however, this hasn’t been the case at all and I would highly recommend a bread machine to anyone who would like to make their own bread at home.
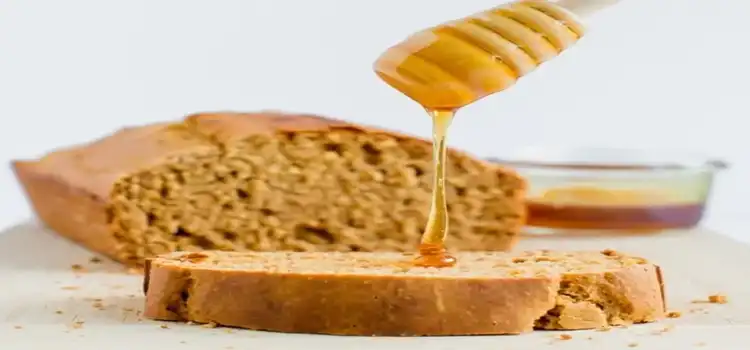
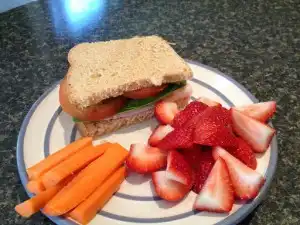
You control the ingredients! I make a loaf of sandwich bread every 2-3 days now, depending on what we have going on. Not only do I make my own honey whole wheat sandwich bread, I also use it to make French Bread, Whole Wheat Cinnamon Raisin Bread, Honey Whole Wheat Sandwich Buns, and Whole Wheat Pizza Dough.
I actually only use my bread machine to make the dough. The machine can bake the bread as well, but I don’t like the tall, short shape of the finished loaf. Because of this, I now make the dough in the machine, let it rise in a loaf pan on the counter, and then bake it in the oven.
I will admit that it’s kind of a lengthy process from start to finish…but the actual “work” involved on my part is very minimal.
I should share that my husband thinks slicing the bread is a pain. He has told me he now fully understands the saying, “The best thing since sliced bread.”
Check your regular sandwich bread. What are the ingredients in it? Are the ingredients that you would bake with at home? All of them? The biggest reason I bake my own bread is to avoid many of the preservatives contained in so many brands.
The one that shocked me the most was a foaming agent called Azodicarbonamide, which is used in the production of foamed plastics. This chemical is banned in many other countries, but allowed in the United States because it extends the shelf life of bread.
Of course, I found that pretty alarming and was even more frustrated when I saw that the bread we had been buying for YEARS contained this chemical as well.
A few months ago, I decided to add ground flaxseed meal to my dough and it turned out great! Just 2 tablespoons contain as much fiber as 1 1/2 cups of cooked oatmeal. To get the natural antioxidants called lignans contained in flaxseed, you’d have to eat 30 cups of fresh broccoli.
And the oil in it is about 50% alpha-linolenic acid, which is a plant version of omega-3. As you can see, adding just a little flaxseed to the dough boosts the nutritional content of each loaf by quite a bit!
Here is my recipe. I’ve made this loaf so many times now, I don’t even have to think about it anymore!
Honey Whole Wheat Sandwich Bread Recipe
Ingredients:
- 3 cups white whole wheat flour
- 1/4 cup vital wheat gluten flour
- 1 tsp kosher salt
- 1-2 T ground flaxseed
- 1 cup warm water
- 1 T milk (I use organic whole)
- 2 T organic butter, chopped up into pieces
- 2 T honey
- 2 1/4 tsp fast rise yeast
I put all of these ingredients into my bread machine (in this same order)…and put the yeast into the yeast dispenser. Then I set the machine to the ‘wheat cycle, dough’ and press start.
When the timer beeps, I press the dough into a greased loaf pan and cover with a towel for 1 hour to let rise. Preheat the oven to 350 and then bake in the oven for 24 minutes. As soon as it’s done, I pop the loaf out onto a cooling rack and let it sit until it’s completely cooled. Then I store and slice and eat!
*Tips: If you’re not going to eat some immediately (like with dinner), wait until it cools completely before trying to slice off the pieces you need. You’ll have a better result. Also, just slice each piece as you need it, otherwise it will go stale more quickly.
We never have any bread go to waste, however, if you find that you can’t eat an entire loaf within a few days, then you can either freeze individual slices OR make homemade breadcrumbs.
Here is the bread machine I use:
The process of bread making in pictures. Much easy!

Put ingredients in the pan.
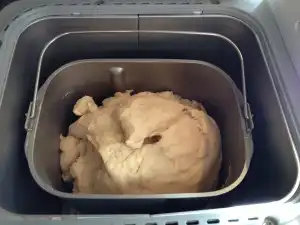
When the timer beeps, the dough is ready.
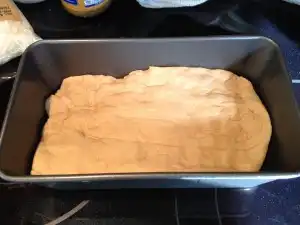
Press the dough into a greased loaf pan.
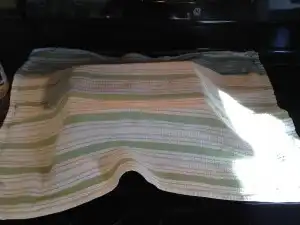
Cover for 1 hour, then bake.
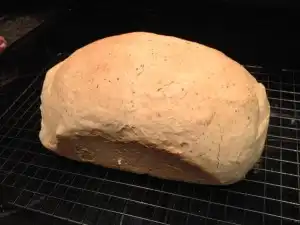
Remove from pan and let cool.
Enjoy!
It really is that easy to enjoy your own homemade bread on a daily basis. I have only purchased two loaves of bread this ENTIRE year and they were both when we went on vacation to Florida and I didn’t have access to making my own.
It’s worth the investment. Feel free to ask me any questions if you’re unsure!
And if you want to know how you can have soft, spreadable REAL organic butter at all times, read my post How Does a Butter Crock Work? This is such a cool concept to me and I love my new crock.