Whether it’s for a birthday bash, a summer picnic, or a special celebration, transporting your ice cream cake without turning it into a melted mess is a crucial point to consider.
Transporting an ice cream cake may seem challenging, but with proper preparation and a few simple techniques, you can ensure that your frozen treat reaches its destination intact.
But fear not! We’re here to guide you through the process, ensuring your frozen ice cream cake arrives at its destination perfectly intact.
Qualities of Ice Cream Cake That Affect Transportation
Before entering on the journey of transporting these frozen delights, it’s essential to dive into the unique nature of ice cream cakes. These frozen confections demand special attention because of their own nature.
The Uniqueness of Ice Cream Cakes
Ice cream cakes are the ultimate fusion of cream and classic cake flavors. They require special consideration due to their dual nature. The creamy ice cream layers alongside moist cake slices create a challenge in maintaining the ideal texture and temperature during transport.
The Temperature Sensitivity Factor
Temperature is the most important factor when it comes to ice cream cake transport. Ice cream cakes demand a frosty environment to avoid the meltdown. One moment of warmth can lead to a complete disaster!
Structural Challenges Of An Ice Cream Cake
Think of your ice cream cake as a multi-tiered architecture. Layers of ice cream and cake intermingle with delectable fillings and frostings. Keeping these components intact while on the move requires a strategic approach that involves insulation, stability, and proper packaging.
Preparation Before Transportation
Getting your ice cream cake from point A to point B without a meltdown might seem like a great challenge, but fear not! We’ve got the instructions on how to make it a breeze. Before you hit the road, there are a few things you need to do to ensure your frozen treat stays deliciously intact.
Proper Timing And Freezing
The secret to an ice cream cake journey lies in planning. Make sure your cake is frozen solid before beginning. Timing is essential; the cake should be frozen enough to maintain shape, but not so frozen that it’s impossible to slice.
Selection Of The Right Container
Your choice of container can make or break the transport mission. Opt for an insulated cooler or a box that can maintain low temperatures. Avoid plastic bags; they may be convenient, but they won’t offer protection.
Taking Necessary Supplies
Gather your transport arsenal: plastic wrapping for physical protection, foil for an extra layer of insulation, and gel packs to keep things chilly. These supplies are your loyal companions in the fight against meltdown.
Assembling Your Toolkit
Don’t forget the practical tools too! Spatulas come in handy for precision movement, while gloves ensure your hands don’t become the cause of accidental thawing. Prepare a toolkit that’s as cool as your cake.
Packing Your Ice Cream Cake Safely
Packing is very important to keep your ice cream safe and intact during transportation. Proper packing ensures the protection of your ice cream against temperature and other physical damage.
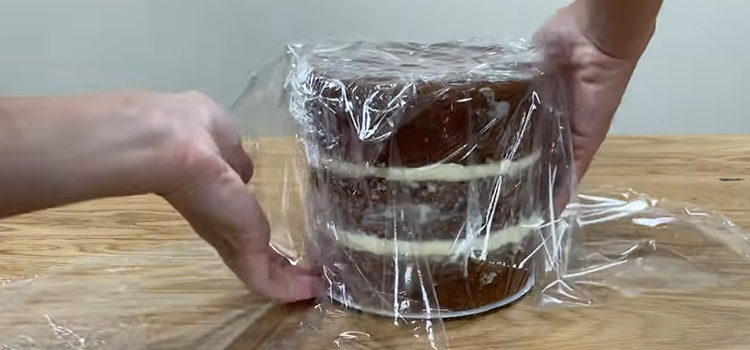
Wrapping the Cake Layers
Imagine your cake layers as layers of protection. Wrap each layer properly with plastic wrap to guard against moisture and temperature changes. This step not only prevents leakage but also maintains the cake’s structural integrity.
Creating a Cold Barrier
Gel packs are required to be used as cold barriers. Position them strategically around the cake within the container. If you’re feeling daring, consider dry ice for extended trips; just be cautious, as it’s colder than a snowman’s smile!
The Insulation Factor: Towels and Bubble Wrap
Insulation is your ticket to ride. Surround the cake container with towels or bubble wrap for an extra layer of defense against external temperatures. The more insulated, the better the condition of the cake.
Securing Inside the Container
In the world of ice cream cake transport, stability reigns supreme. Fill any empty spaces within the container with crumpled paper or towels to prevent the cake from shifting during the journey. A stable cake is a happy cake.
Choosing the Right Transportation Method
When it comes to ensuring your delightful ice cream cake reaches its destination safely, selecting the ideal transportation method is the first step. The transportation method you choose is your secret weapon.
The journey might be short or long, but with the right approach, you can sidestep the melting mishaps and enjoy a picture-perfect frozen treat upon arrival.
Carrying The Ice Cream Cake In Hand
If your journey is short, consider being the designated cake bearer. Hold the container level, and avoid sudden movements. Treat it like a precious cargo – because it is!
Using a Cooler During Transportation
A cooler isn’t just for drinks; it’s a cake’s best friend. Place your well-insulated cake container inside the cooler to create a temperature-controlled cocoon. The added benefit? The cooler doubles as a stability enhancer.
Driving with cake
If you’re taking the cake on a car ride, drive smoothly, take turns gently, and brake gradually. Treat it with kindness, and you’ll be rewarded with a cake that’s as delicious and pretty as it was before the journey.
Taking Your Ice Cream Cake on a Plane
When it comes to Air travel, it requires a bit of special strategy. Air travel may seem like a chilly challenge, but with the right tactics, your ice cream cake will be intact and ready to delight.
Know the Regulations Of The TSA
Before you soar the skies with your cake, acquaint yourself with the Transportation Security Administration (TSA) guidelines. Some restrictions apply, and it’s better to know them before you reach the security checkpoint.
Preparing for Security Checks
Expect your cake to go through a security screening, just like you. Be prepared to explain that it’s an ice cream cake; you might even make the security staff jealous!
Packing Of The Cake for a Flight
Air travel requires an extra layer of planning. Opt for a sturdy, well-insulated container and consider the limitations of carrying dry ice on a plane. Check with your airline for specific rules and regulations.
Long-Distance Travelling With Ice Cream Cake
So, you want to take that yummy ice cream cake on a long journey? Whether you’re headed for a fun road trip or a faraway destination, here’s how to keep your ice cream cake from melting.
Taking In Trunk
On a road trip? Your trunk is your new best friend. It’s cooler than the interior and provides a dark, temperature-controlled environment for your cake’s smooth journey.
Replenishing Ice Packs In Rest Stops
During your adventure, plan for pit stops. Replenish or replace gel packs as needed to ensure your cake’s chill factor remains optimal.
Dealing with Temperature Fluctuations
Mother Nature can be unpredictable. If you encounter unexpected temperature changes, find a shaded spot or even crank up the air conditioning to shield your cake from warm conditions.
Avoiding Common Transport Mistakes
Transporting an ice cream cake can be a disaster due to mistakes during transportation. But we are here to help. In this section, you will get common mistakes during transportation and the ways to sidestep them.
Rushing The Process
Ice cream cakes and last-minute dashes don’t mix. Rushing leads to haphazard packing, and your cake deserves better. Plan ahead and allow ample time for preparation.
Not Enough Insulation For Ice Cream Cake
The frosting isn’t insulation. While a layer of frosting adds flavor, it won’t protect against temperature shifts. Ensure your cake is surrounded by proper insulating materials for a successful journey.
Skipping The Stability Measures
A tipping cake is a sad cake. Don’t skimp on stability measures. Secure your cake within its container, and pad any empty spaces to prevent unfortunate tilts.
Emergency Situations: What to Do If Things Go Wrong
Ice cream cakes are a delightful treat. But what if you find yourself in a sticky situation while transporting this frozen delicacy? Don’t worry. Follow the mentioned tips.
Quick Fixes Of Melting Mishaps
If you notice a hint of meltdown, don’t panic. Place the cake in a cool environment, like a fridge or freezer, for a quick recovery. This will offer a quick fix..
Touch-Up Strategies For Damaged Exterior
If the exterior appears damaged due to the journey, don’t fret. Gently fix any imperfections with a touch of finesse. After all, it’s what’s inside that truly matters.
Salvaging a Partially Thawed Cake
If things go south and your cake starts to thaw, it’s not the end of the world. Quickly assess the situation, and if it’s still partially frozen, consider serving it as a delectable ice cream treat.
Reaching Your Destination
Finally, you have arrived at your destination. Check out the following steps that should be done after reaching your destination.
Immediate Steps After Arrival
Congratulations, you’ve arrived! Carefully unpack the cake, removing any insulation or gel packs. Allow the cake to sit for a few minutes to adjust to the new environment.
Re-Freezing Of The Cake
If your cake has survived the journey with minimal melting, you might be wondering if it can be refrozen. As a general rule, it’s best to avoid refreezing, as it can impact the cake’s texture and taste.
Allowing The Cake For Condensation
After transport, you might notice a bit of condensation forming on the cake’s surface. Don’t be alarmed; this is a natural result of temperature changes. Simply pat the cake gently with a paper towel to absorb excess moisture.
Frequently Asked Question
Can I Use A Regular Cake Carrier For Ice Cream Cakes?
While a regular cake carrier might suffice for a traditional cake, ice cream cakes require a tad more attention. Opt for an insulated cake carrier with gel packs or dry ice compartments.
Can I Transport An Ice Cream Cake In A Car During Summer?
A car with air conditioning is your ally during summer. Blast that AC before you embark on your journey. Additionally, choose the coolest time of day for transport and avoid leaving the cake in a sweltering vehicle for extended periods.
Can I Decorate The Cake Before Or After Transport?
It’s wise to postpone decorating until after you reach your destination. Bumps and sways in transit can wreak havoc on delicate decorations. Pack your adornments separately and unleash your artistic flair once your cake has settled in its new spot.
How Fast Should I Reach My Destination When Transporting An Ice Cream Cake?
Speed isn’t everything, but it does matter when you’re the custodian of an ice cream cake. Aim for the most direct route to your destination. Minimize stops and detours to prevent prolonged exposure to warmth
Can I transport multiple ice cream cakes at once?
Transporting multiple cakes requires a strategic approach. Ensure each cake has its designated space within the carrier and is adequately insulated. Consider using dividers to prevent cakes from coming into direct contact with one another.
What alternatives can I use for insulation if I don’t have access to dry ice or gel packs?
Dry ice and gel packs are prime choices for insulation, but in their absence, you can improvise. Wrap the cake in multiple layers of thick towels or blankets. Place it in a sturdy box and pad the empty spaces with crumpled newspaper or more fabric.
Conclusion
Transporting an ice cream cake might seem challenging, but with the right techniques, it’s an achievable mission. Remember, the journey is part of the cake’s story, and with a bit of care, you can ensure it arrives properly and perfectly.